Chapter 4 - Fuselage Bulkheads
Chapter Overview
In this chapter the seven bulkheads which connect the sides to the bottom will be made. They are made using the following types of foam:
| Thickness | Density | Material | Bulkhead |
|---|---|---|---|
| 0.2 inch | High | Last-a-foam | F-22 F-28 Instrument panel |
| 0.75 inch | Low | PVC foam | Seat back |
| 0.25 inch | Medium | PVC foam | Forward and aft landing gear bulkheads |
| 0.25 inch | N/A | Birch plywood | Firewall |
Step 1 - Front seatback
November 18, 2006
Made a heat tent for the work table. This was done by making 8 upright supports, 4 on each side of the table. Each upright is 3-feet above the table. This should be high enough to allow the fuselage to fit underneath. Each pair of supports has a cross piece along the top. The table and uprights are covered with a 11foot 6 inches x 23 foot tarp from Harbor Freight.
To test it out, I put a ceramic heater under the tarp. It quickly heated the space to 76 degrees F, even though I was using the lowest setting. I left it running over night and when I got up this morning, it was still 76 degrees, even thought the factory had cooled down 10 degrees and was at 64 degrees. I was pleased with the results.
November 19, 2006
I thought it would be a good idea to make copies of the front seat full sized drawings. When I measured the drawings, I discovered the width was 42.3 inches, not the required 42 inches. So when I traced the drawings, I reduced the width to 42 inches. The 28.8 inch height of the drawing was correct.
I used tracing paper to make a copy of the plans. This was a lot easier than I had originally anticipated. I had thought about making a light box to make the tracing easier. After talking to Cozy builder Ted Davis he said a light box was not needed. I tried it and he was right. That saved me quite a bit of time.
I think I am getting close to actually cutting foam. When I do, the clock will start ticking. I'm hoping to complete the project in 2-years. We'll see how that goes!
November 22, 2006
The clock has now started, just 2-years to go! Today, I cut and shaped foam. It required a bit of thought as to how to cut the 45-degree angle on the top of the seat back. What worked for me was to draw a line on the foam 3/4 of inch from the edge. Then, then the bottom edge was placed 1/16th of an inch from the edge of the table. Using a razor knife, I had the blade resting on the edge of the table on the bottom of the foam and cut through the foam at angle so the blade would follow the line on the top of the foam.
December 25, 2006
Christmas day and I get to work on the plane!!!! Yea!
I did a bit of research to determine whether or not the sides of the notches on the front seat back needed to be fiberglassed. After reading the archieves, it appears they are not fiberglassed. Later, any exposed foam will be cut back 1/8 inch, then the gap will be filled with flox to make a strong and tight edge.
I cleaned the factory and then cut all the fiberglass and peel ply needed to fiberglass the back side of the seat back. I had already cut out the notches and rounded the foam in preparation for this layup.
The layup went smoothly, though it took me longer than I had expected. From start to finish, I spent about 4-hours working on the project. However, the layup is completed and now I'm ready to move onto step 2, making the forward bulkheads.
Step 2 - Forward Bulkheads
The forward bulk went smoothly. Nothing to report except it took me 19 hours and 17 minutes to complete this step.
Step 3 - Instrument Panel
Oh, the instrument panel turned out very nice. I used peel ply over the entire aft face and when I pulled it off, it looked really nice.
The instrument panel took 21 hours and 38 minutes to complete. This does not include any clean-up time or tracing time. However, it does include foam and fiberglass cutting time.
|
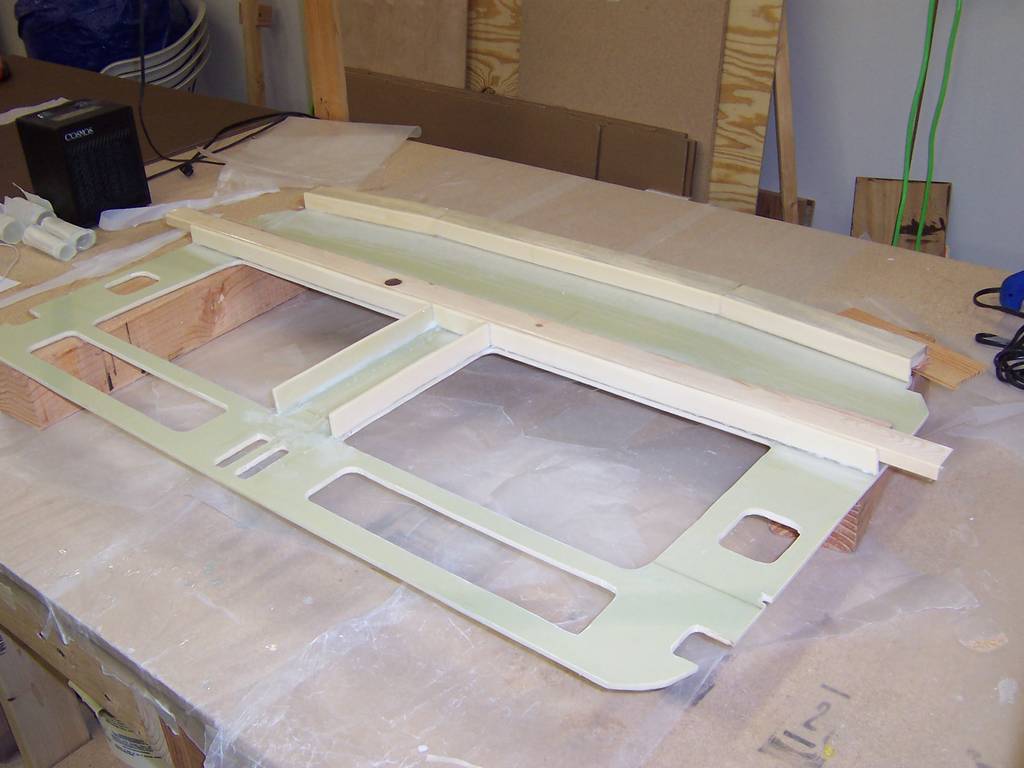
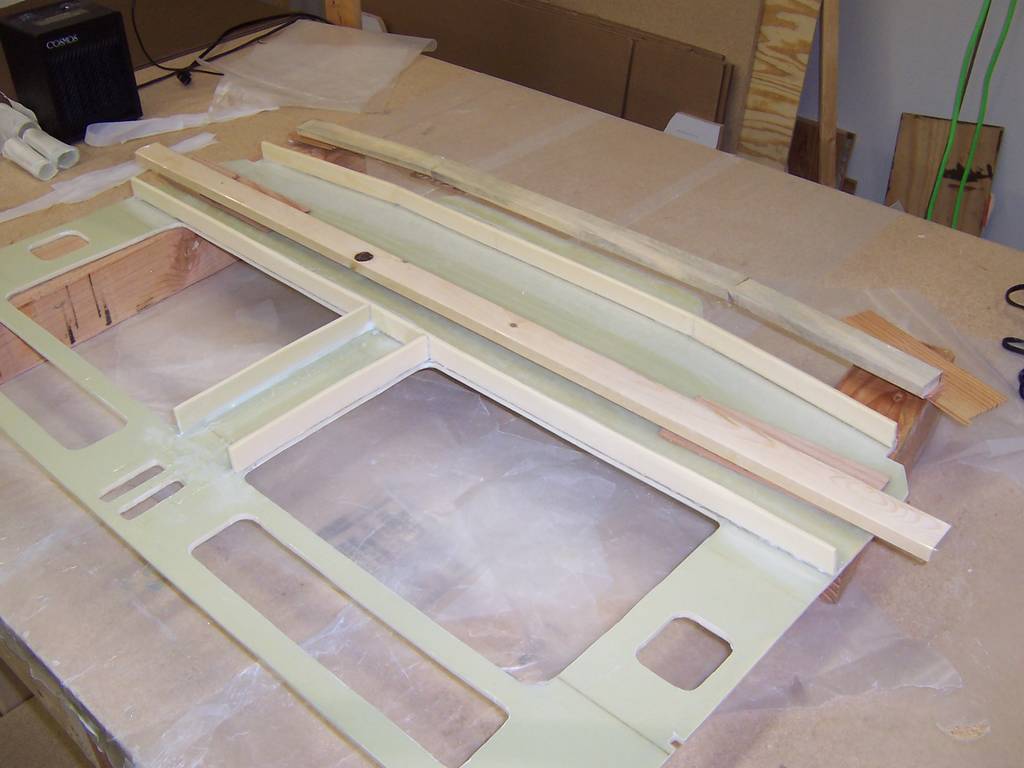
|
| The pieces of wood above the stiffeners are the form for the electrical wiring tray | Here the forms are in position and ready to be fiberglassed |
Step 4 - Landing Gear Bulkheads
The landing gear bulkheads were a minor inconvenience. I followed the FAQ and instead of having 22-BID layers for the hard points, I had 26. This large number of layers is needed to creat the 1/4 inch thick hard points. Once I was finished with the layup, I put 100 pounds of weight on top of it. The idea is the weight would squeeze out the excess epoxy and compress it to the needed thickness. Well, mine didn't work that way. They were too thick! I tried to sand them down using a large disk sander, but it was taking too long. I then took them over to Ted Davis' company and he and I tried to mill them down on a milling machine. By the time we had everything set up and started the milling process, it was getting very late. It looked like it was going to take a couple of hours to grind them down. I finally gave up, bit the bullet and remade them. The second time around, it went much faster! I spent much more time trying to "fix" the problem, than it took me to remake them!
During this time, I needed to go to Florida to help my parents out. They were both ill at the same time and when you are 85 years old, any illness can be serious. I spent a month with them before returning home. My brother helped them out for 2-weeks, then he had to go back to work, so I returned to Florida for another month. The upside was I got to go to Sun-N-Fun, which was quite interesting. When I returned, it took me two weeks to catch up. In all, I believe I lost about 3-months. You can see this gap on the chapter status page for chapter 4 step 4 and 5. When I started work again, it only took me two weeks to finish up steps 4 and 5.
Step 4 took 33 hours and 6 minutes.
Step 5 - Firewall
I cut the firewall out in January and then put it on hold till I finished the landinrg gear bulkheads. This step didn't take much time at all.
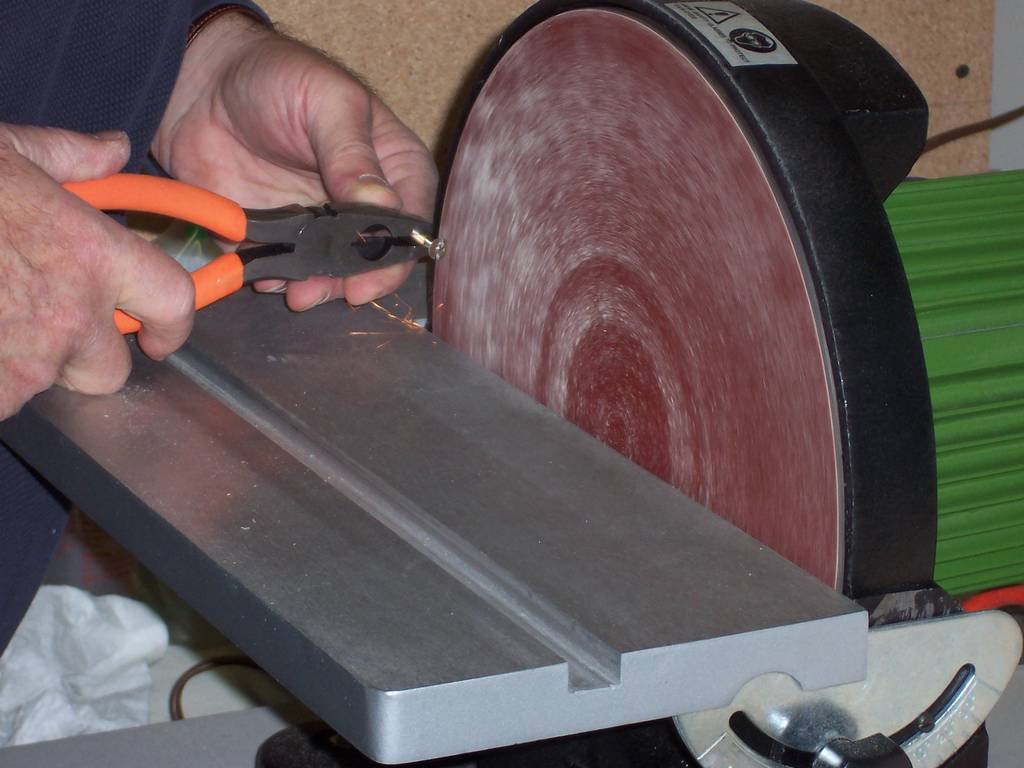
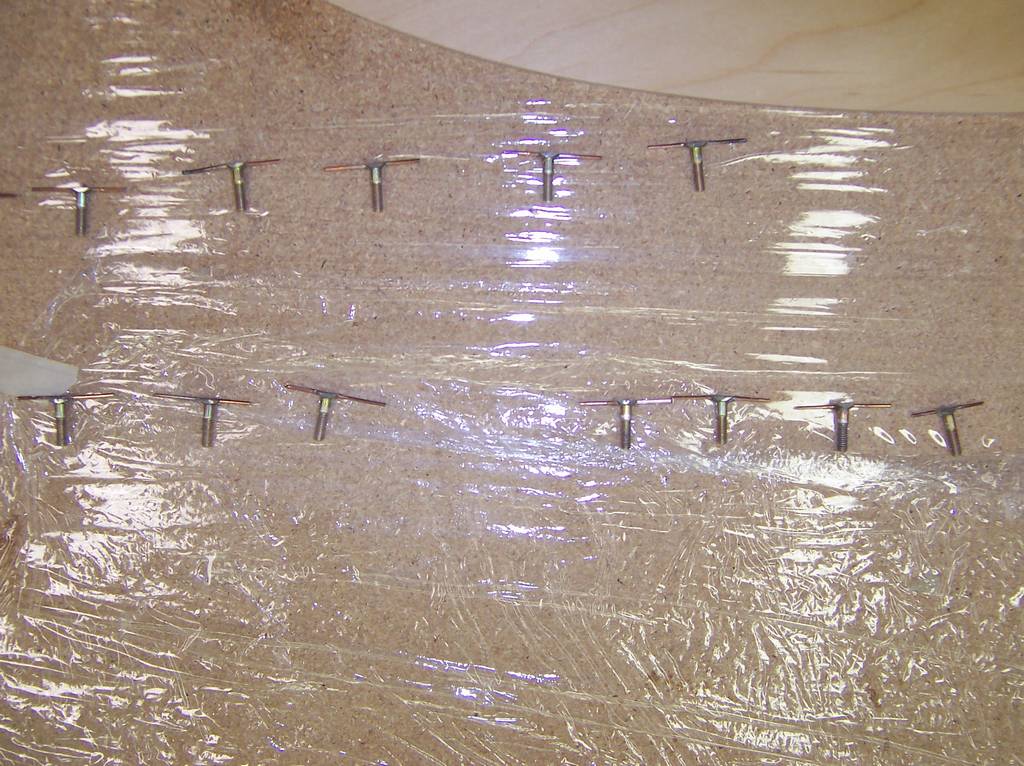
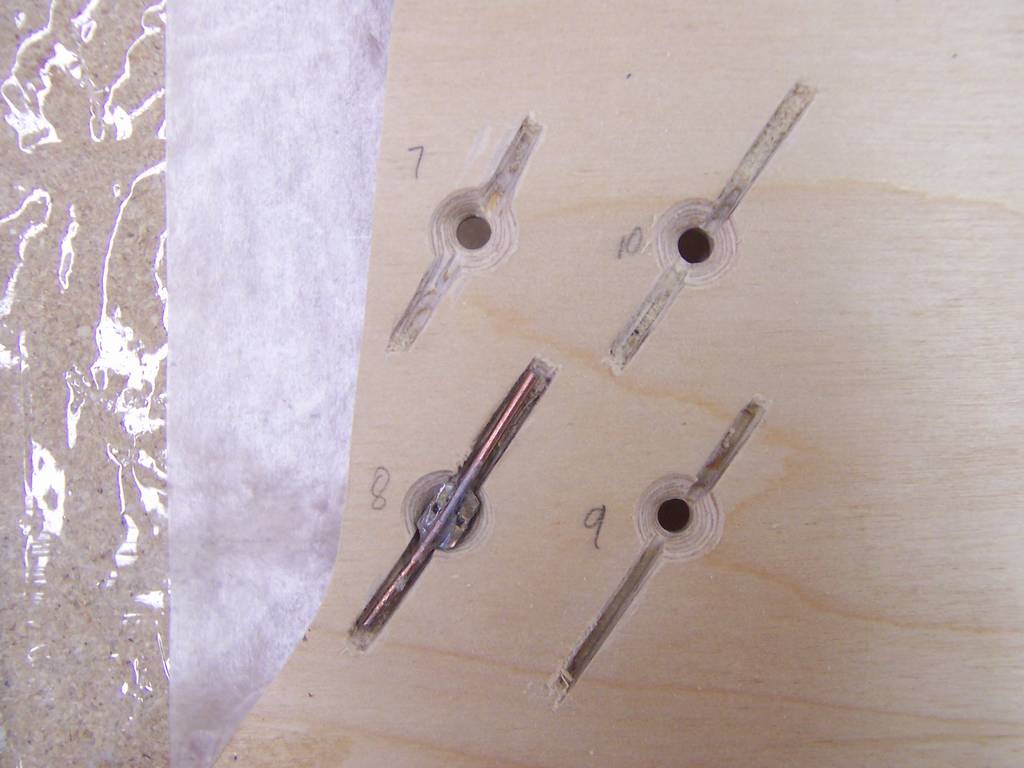
The trickiest part was the blind screws. I was very concerned with potential problems of having them turn when I mounted the pulleys. I had heard stories of this being a problem. I was determined not have that problem! To make sure they did not turn, I filed the sides flat, as instructed it the plans. Then I filed a notch in the top of each screw and epoxied a short piece of welding rod into the slot. I then made slots in the back of firewall for the welding rod to sit into. Next, it was all buried with flox. I don't think they are going to twist at all!
|
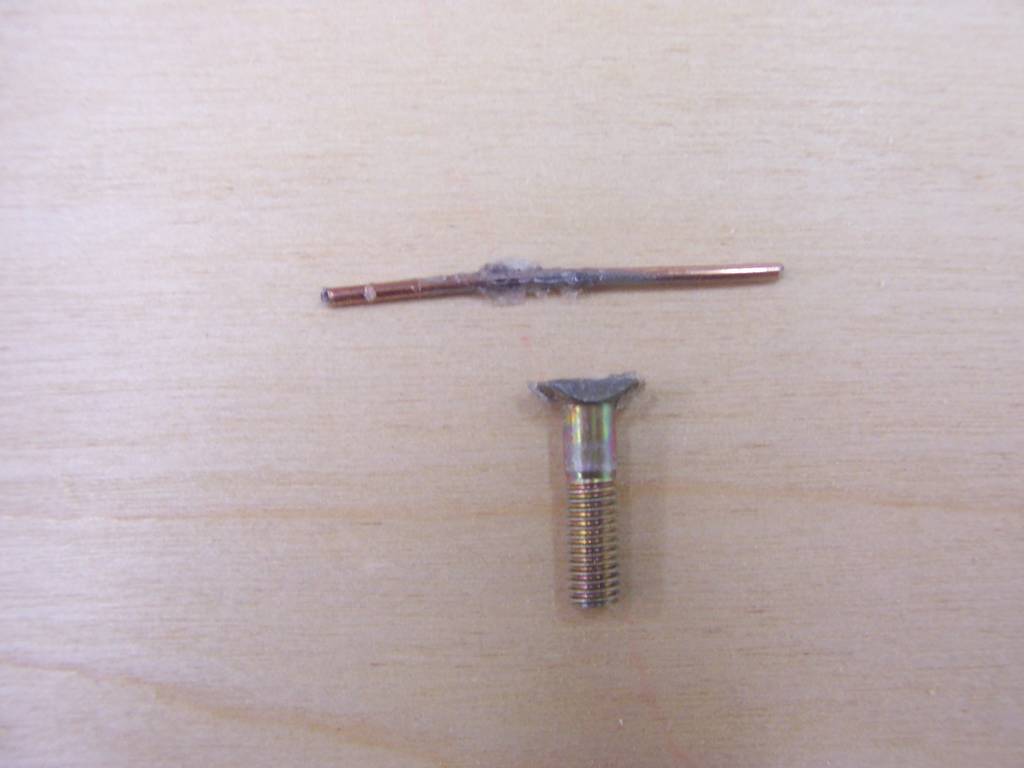
|
| Grinding the "flats" on the blind screws | Welding wire and blind screw ready to be epoxied together |
|
|
| All 14 blind screws ready to be floxed onto the firewall | Holes for screws, both countersunk and with cutouts for the welding wire to lay in |
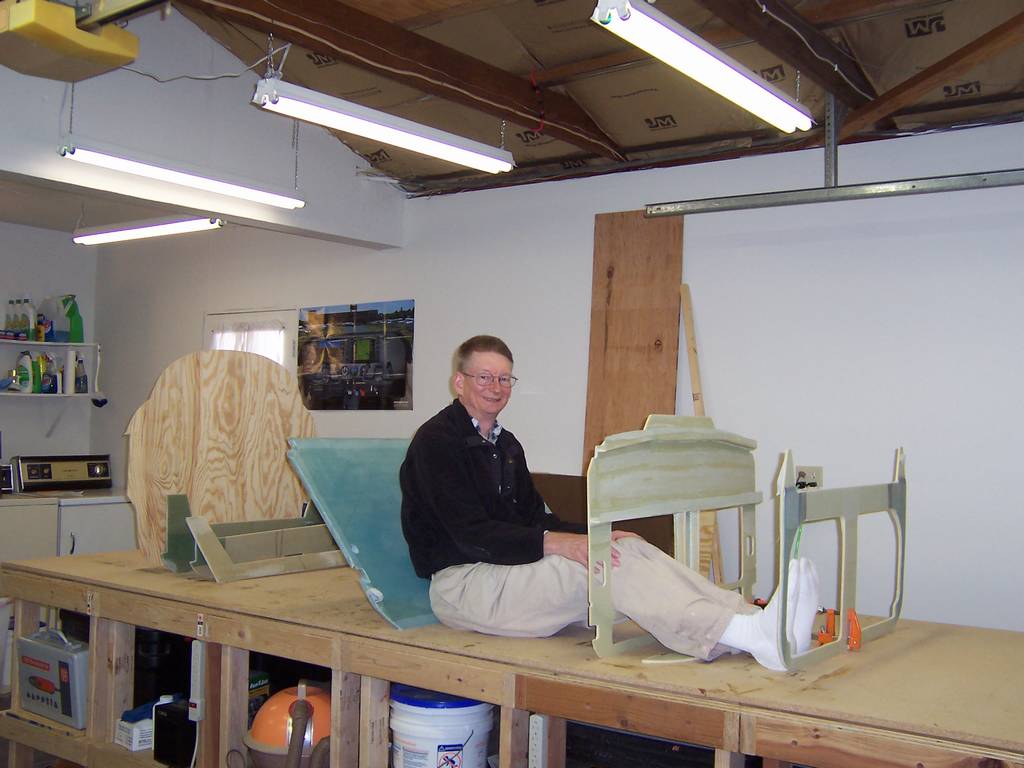
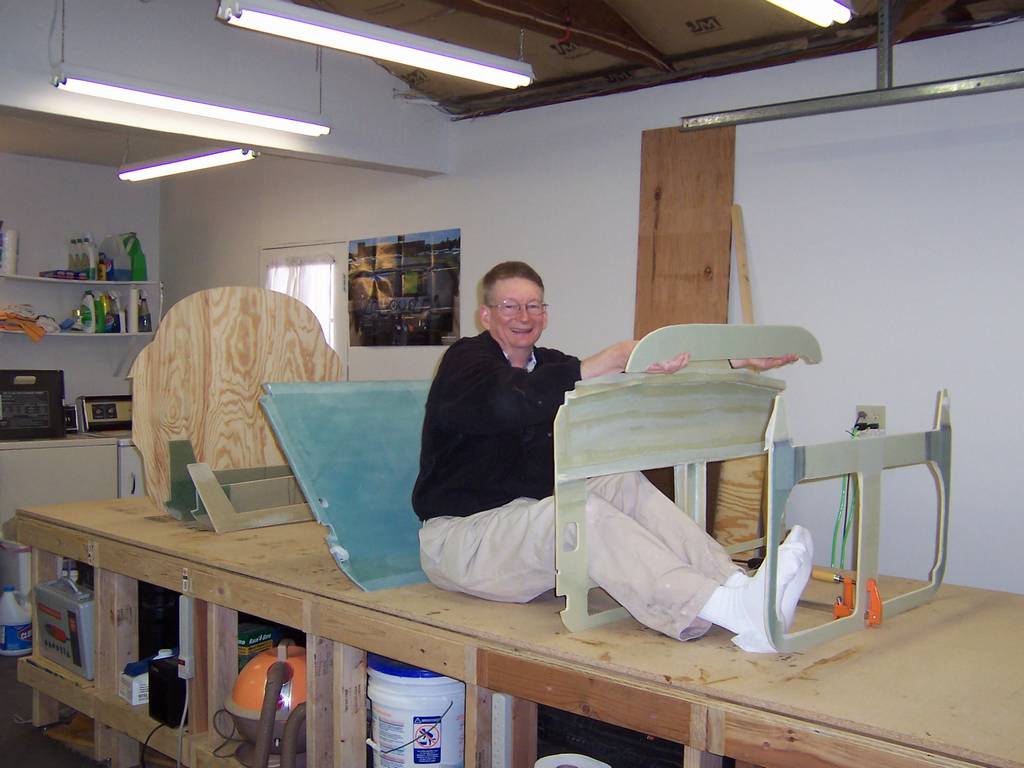
Making Airplane Noises
May 19, 2007
What can I say? After all the work of completing chapter 4, I could not resist!

|
|
|
|