Chapter 3 - Education
Learning How to Work with Fiberglass
This chapter is all about the various materials used in the construction of the Cozy and how to work with them. It extensively covers fiberglass, epoxy and foam. All aspects of the materials are covered from safety to the joining of the material together to form a strong structure.
Tools Used to Construct a Cozy
I have obtained the following tools to be used in the construction of the Cozy. Some were purchased and others were given to me:
- Table saw
- Harbor Freight band saw
- Harbor Freight disk sander
- Fein variable speed MultiMaster
- Harbor Freight sliding compound miter saw
- Electronic Smart Level
- Ohaus Scout SC4010 400 gram with 0.1 g resolution scale
- Bench top drill press
- Roll around tool box
- Shop Vacuum
- Dritz electric scissors
- Big 4-function calculator
- Respirator
- Face shield
- Dremel tool
- Butcher knife
- Nitrile gloves
- Assortment of screw drivers, wrenches, sockets, files and pliers
- Variable speed 3/8 inch power drill
Fiberglass
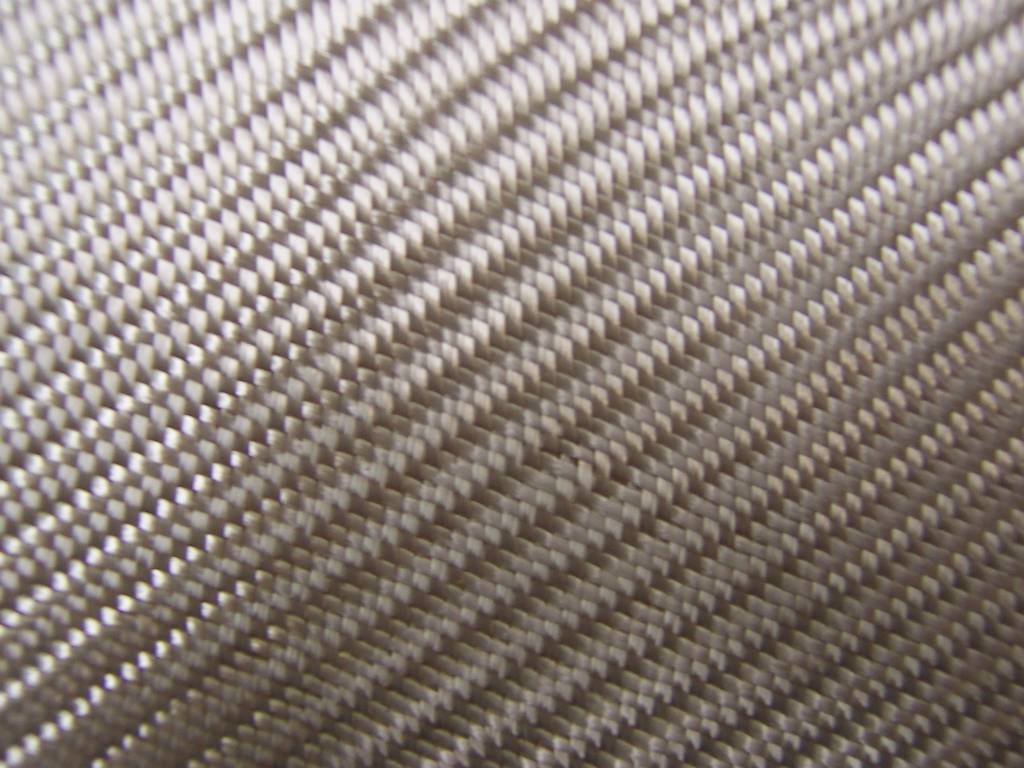
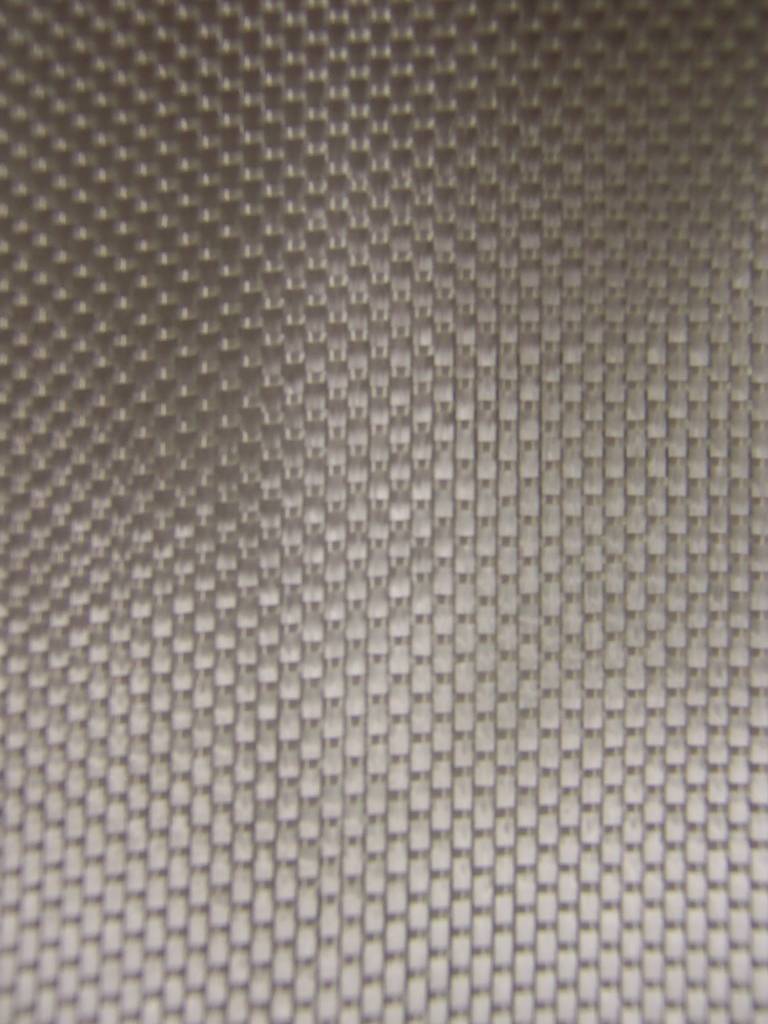
There are two types of fiberglass used in the construction of the Cozy. Both types originally used by Burt Rutan in his LongEz and VariEz planes (the forerunners of the Cozy). They are the RA5277 a bi-directional cloth and the RA5177, a uni-directional cloth. The bi-directional cloth has fibers of equal size in both the warp and weave directions. This makes the cloth equally strong in both directions. The unidirectional cloth has large fibers in the weave (running parallel to the edge) and very small fibers in the warp (at right angles to the edge). Since more fibers can be packed into the weave, the cloth is much stronger in this direction than the bi-directional cloth. However, the bi-directional can more easily be molded into tight corners than the unidirectional cloth.
|
|
| Bi-directional Fiberglass "BID" Note the fibers in both direction are the same size. |
Uni-directional Fiberglass "UND" Note the fibers in one direction are wider than the fibers in the other direction. |
Multiple layers of glass cloth are laminated together to form the aircraft structure. These layers or plys are then saturated with epoxy. Once cured, the combination of the glass and epoxy form a very strong and durable part.
Epoxy
Epoxy is the "glue" that holds it all together. However, it would be incorrect to think of it as glue. Fiberglass cloth is very strong, but too flexible to hold a shape on its own. Epoxy, once cured, can hold its shape, but is very brittle. When the two are combined, they are both strong and can hold a shape. The actual strength is in the strands of the fiberglass and the shell which holds all those strands together is the epoxy.
The epoxy resin, when combined with the hardener, start a chemical reaction changing the epoxy from a liquid to a solid. Unfortunately, prior to curing, the resin to a small extent and the hardener to a much larger extent are poisonous. So, precautions are needed to keep from developing an allergic reaction. The primary defense is the use of gloves and having a continuous flow of fresh air. With a bit of caution, it is safe to work with these chemicals.
There are numerous epoxies which are approved for building the Cozy. I plan to use MGS 285. I chose this as it seems to have the best combination of properties. The ones important to me are:
- Oder
- Flexible setup times
- Post cure
- Allergic reaction
- Price
The odor of MGS is very low, almost non-existent. The hardener does have a slight smell to it, but it is not overwhelming. This will make it easy to be around.
MGS has very flexible set up times. This is controlled by mixing the appropriate amount of slow and fast hardener. The times can range from 40 minutes (using all fast hardener) to 6 hours (using all slow hardeners). Times in between can be obtained by mixing the two hardeners before adding them to the resin.
One of the disadvantages of epoxies is the tendency to soften when exposed to elevated temperatures. This is called the glassing temperature and is abbreviated Tg. MGS, when cured at room temperature, has a Tg of about 120 degrees F. This should be high enough for where I plan to fly.
It appears the various epoxies available have a differing levels of allergic reaction. MGS appears to be one of the ones with the least number of problems. Although, I do know builders who have become allergic to it. It is still best to take precautions, such as keeping the epoxy off of your skin until it has cured.
Since about 16 gallons of epoxy are needed to complete the plane, price is less of a factor than the others listed. MGS is above average in price, though it is not the most expensive. To me, I felt there was a good trade off between price and features.
Foam
Lightweight foam is a very important part of the project. The primary purpose of the foam is to provide shape and to provide a separation between the fiberglass. The foam itself is very weak, however, when used to separate layers of fiberglass it creates a structure that is very resistant to torsion, the twisting and bending that occurs when a plane is in flight. The separation of the two layers does not have to be very much. A quarter-inch will do a lot to strengthen its resistance to twisting.
There are four types of foam used in various densities and thicknesses. They are Styrofoam, urethane foam, PVC foam and Last-a-foam. Last-a-foam is a combination of polyester and urethane. It has properties somewhere between urethane and PVC. The foams and their uses are listed in the table below.
| Pounds per ft3 | Density | Foam | Type | Application |
|---|---|---|---|---|
| 2 | Low | Styrofoam | wings, winglets, elevators and canard | |
| 2 | Low | Urethane | U-thane 210 | non-structural, nose & canopy |
| 3 | Low | PVC | R45 | fuselage & fuel tanks |
| 6 | Medium | PVC | R100 | center section of spar and canard inserts |
| 16 | High | PVC | R250 | bulkheads |
| Last-a-foam | bulkheads and miscellaneous fuselage parts. Last-a-foam is a combination of polyester & urethane foams |
Glass Lay-up
There are several steps to making a fiberglass lay-up. They are:
- Step 1: Personal Preparation
This is getting ready for the lay-up. Some major lay-ups take several hours and before starting you need to plan ahead for your needs, such as making a pit stop at the bathroom. Other items to check are to be sure the room temperature is correct, the shop is clean and free of dust and dirt.
- Step 2: Cut fiberglass cloth
Since the epoxy has a limited time before it sets, it is important to have everything ready before starting the lay-up. All of the fiberglass needs to be cut to the proper size.
- Step 3: Prepare surface
The surface of the foam must be ready for the fiberglass. This includes proper shape, leveling of uneven areas and vacuuming off any dust.
- Step 4: Mix epoxy and apply to surface
Mix only the amount of epoxy you need at the moment. For large lay-ups, mix many small batches as they are needed. If you see any gouges in the surface, fill them with a mixture of microballons and epoxy to make a paste.
- Step 5: Lay on the cloth
Once the surface has a thin coat of epoxy on it, apply the fiberglass. Straighten the cloth to make sure all of the fiberglass threads are straight and don't curve left and right. For maximum strength it is important they are all straight as an arrow.
- Step 6: Wet out the cloth
Pour enough epoxy on the surface to wet out the cloth. Use a squeegee to make light passes to remove any excess epoxy. Epoxy does not add strength, so excess epoxy only adds weight. This is also a good time to trim the cloth to within 1/4 inch of the foam. Any longer and the weight of the overhanging cloth may cause a bubble to form between the cloth and foam near the edge of the foam.
- Step 7: Squeegeeing
Use a squeegee to draw out the excess epoxy. A squeegee can be as simple as an old credit card or one of the plastic hotel room keys or it can be a rubber squeegee purchased at Home Depot. As long as it is stiff but slightly flexible, it'll work as a squeegee. A good test to check if there is too much epoxy is to lightly draw the squeegee across the surface, then stop. When you stop, if you see a ridge of epoxy in front of the squeegee, then it is too wet. It is important not to press the squeegee to hard as you may make the layout too dry.
- Step 8: General inspection
Once the lay-up is completed, take a good look at it. Look for air bubbles under the fiberglass or areas with not enough epoxy (whitish areas). It is important to find these problems now as they are easy to correct. Once the epoxy cures, they can still be repaired, but it is much more difficult.
- Step 9: Cleanup
It is best to cleanup before the epoxy cures. Right after a lay-up is completed, it is easy to wipe the epoxy off of the squeegee and to clean any brushes you may have used. Once it has cured, it is much more difficult.
- Step 10: Knife trim
This is best done at the "chewing gum" stage. This is about 3 - 4 hours after the epoxy has set. When has the texture of chewing gum, it can easily be trimmed using a knife. The fiberglass should be trimmed completely back to the edge of the foam. However, with the Fein MultiMaster, this can be done after the epoxy has completely cured. The MultiMaster takes off the excess fiberglass very quickly.
Practice lay-ups
A very important part of the chapter are the three practice lay-ups. The projects range from a simple layering of epoxy coated fiberglass to a complex book end with lots of curves and depressions into which the fiberglass must be smoothly placed. There are also flox and micro corners techniques which are learned during this chapter.
Flat Lay-up
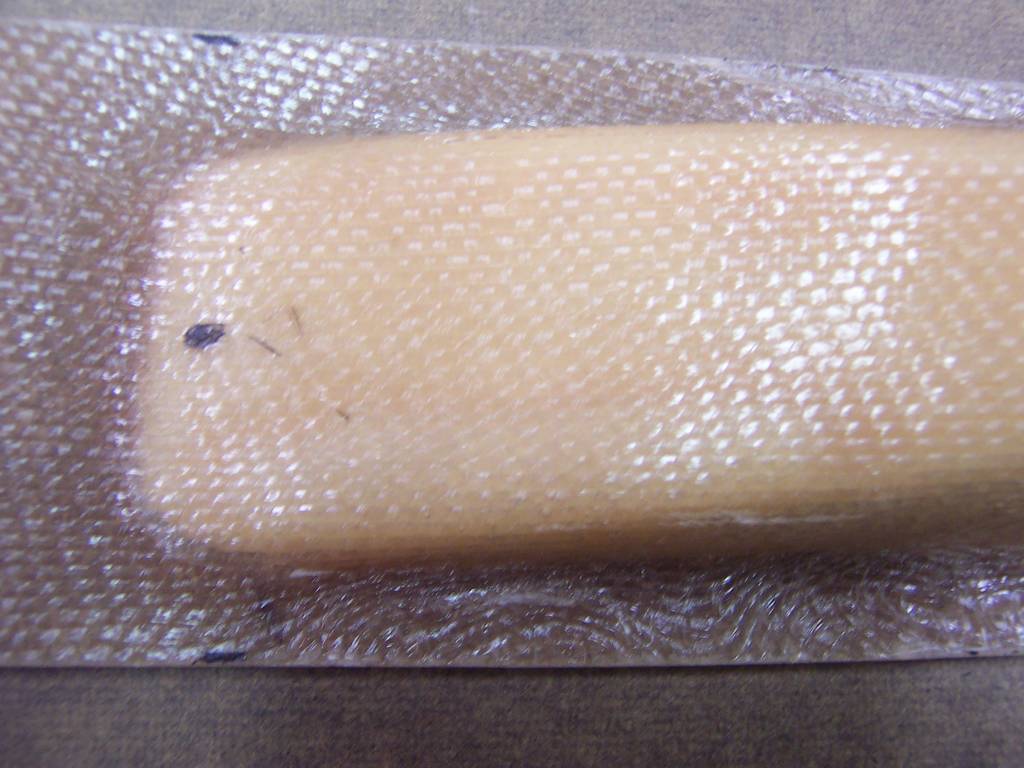
As simple as placing six layers of fiberglass and epoxying them together is, I managed to make a mistake. I had done the lay-up on top of aluminum foil as this was a technique I had read about and thought it would be interesting to try it. Unfortunately, I either hadn�t read or had forgotten that I was supposed to remove the lay-up from the foil before it hardened. Well, I didn�t do it. I even trimmed it when I trimmed the layers at the ?chewing gum? stage. When I had laid the foil down, I had used two overlapping pieces. After the epoxy had cured, I removed one sheet of aluminum foil very easily. It had a long edge which I grab onto and pull it off as one piece. The other piece was a different story, there was no good edge to grab. All I could do was pull off small strips about 1/4 inch wide, which when pulled would get narrower and narrower until it broke. As you can see in the picture below, the aluminum foil is well attached to the fiberglass sheet.
Other than this mistake, the six layers look pretty good. I could not find any air pockets or dry spots. I was quite pleased with the way it turned out.

|
| Flat Lay-up The silver area is the aluminum foil that I did not try to remove until after the lay-up had cured. I could not easily remove it. |
Confidence Lay-up
For this project, a piece of foam is shaped and then fiberglass is placed over and around the foam. The purpose of this project is to show how strong and light fiberglass construction can be. Once the lay-up is completed and has cured, you place your entire weight on it while it is balanced on a broomstick. Since I am fairly lightweight, I had a BIG friend of mine put his weight on it and it did not break. It held just as it was supposed to.
Even though the confidence piece was able to hold the weight without breaking, my fiberglassing was not as I had intended. In many locations there are air bubbles. I have no idea where these came from. I inspected the lay-up after completion and there were no air bubbles or dry spots. I left it to cure confident it was done perfectly. Boy was I surprised when I came back after it had cured and found many air bubbles in the corners. I�m not sure where they came from. A couple of builders told me they had seen the same thing, on other pieces, and felt it was out gassing of the epoxy as it cured. This lay-up took me a long time to complete and the epoxy was setting as I finished the final layer. I�m wondering if this may have been the cause.
Below are pictures of the lay-up, including some close-ups of the air bubbles.

|
|
| Confidence lay-up | |
|
|
| Close-up showing a large air bubble | |
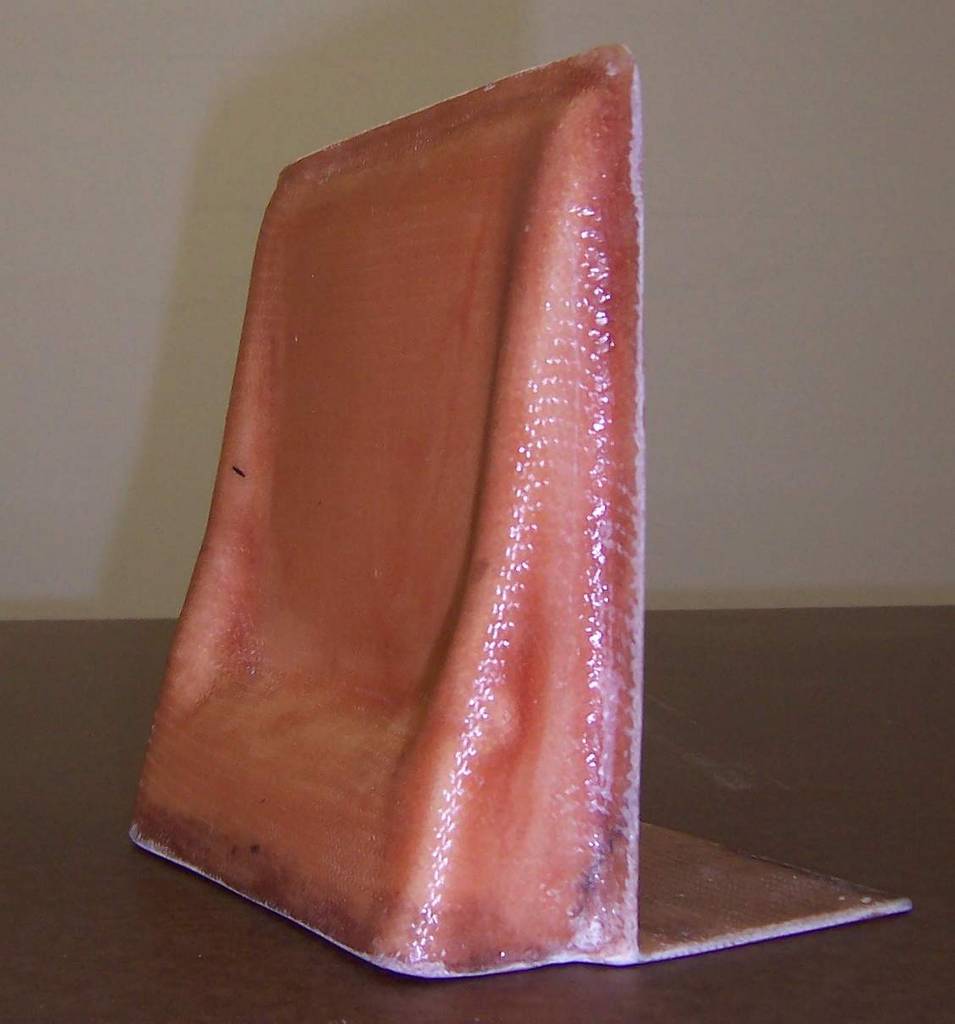
Book End
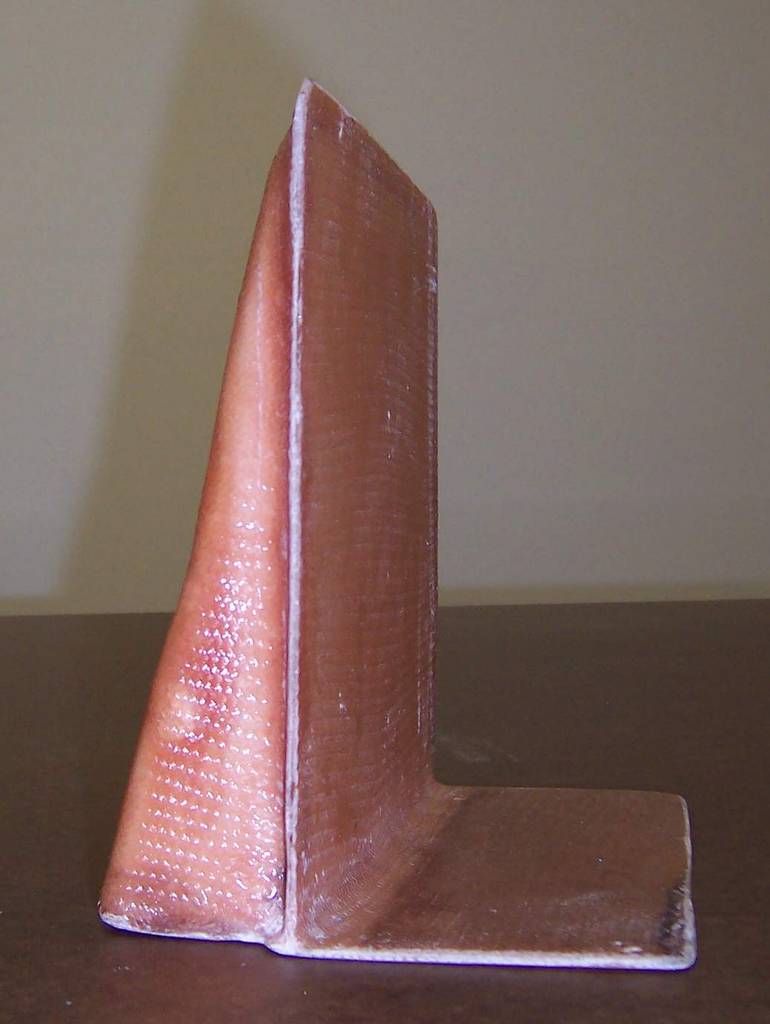
The final project was to make a bookend. During this project we learned about cutting fiberglass, foam preparation, use of epoxy slurry, working with fiberglass on flat surfaces, corners and compound curves. We also learned about making flox corners, concave and convex foam carving and how to prepare surfaces for glass-to-glass lay-ups. It has three separate lay-ups, each taking a day to cure. Boy this was a lot of work for a bookend!!!
|
|
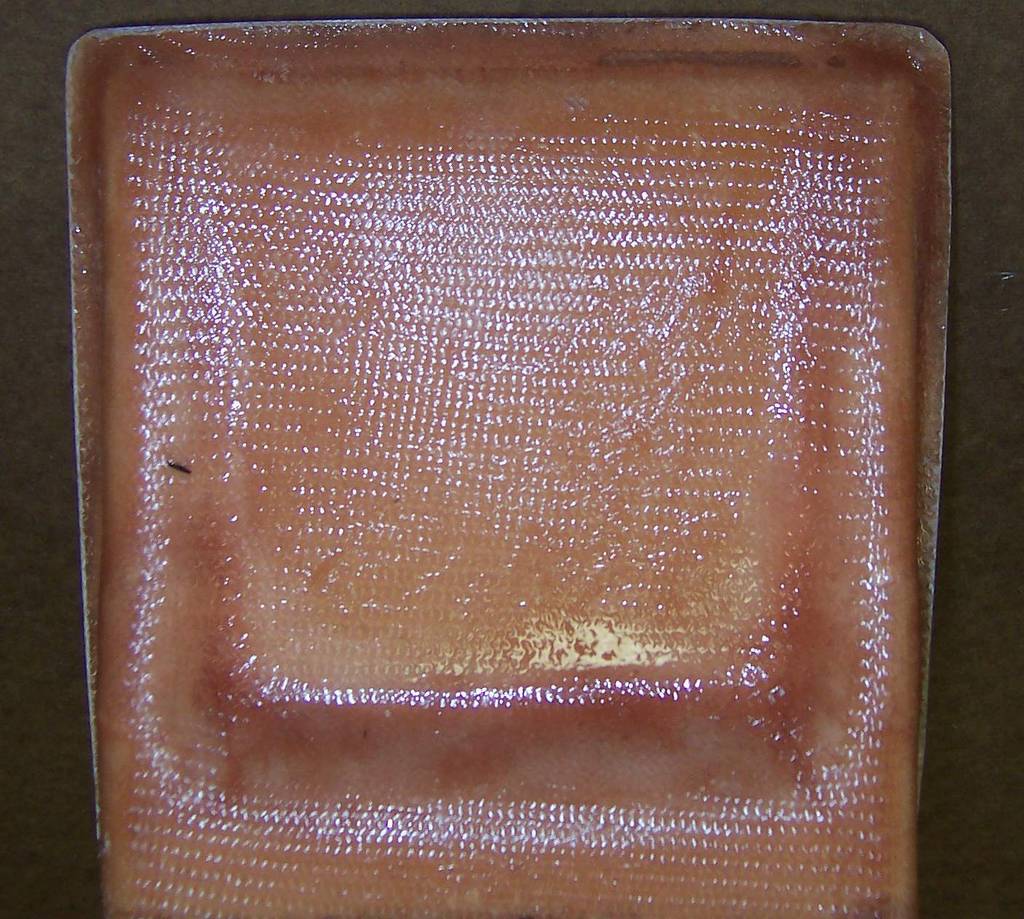
|
| Bookend - front view | Bookend - side view | Bookend - back view |
Aircraft measurement reference system
I was not familiar with the coordinate system used for aircraft. A coordinate system is a method by which each single point can be identified. The most common coordinate system is use is latitude and longitude, which is used to identify each point on earth. For aircraft, each point is identified by:
- Butt lines
Butt lines "BL" measures, in inches, from the centerline of the aircraft outward toward the wing tips. A "L" or "R" is affixed to the measurement to indicate "left" or "right" as seen by the pilot when seated in the cockpit.
- Fuselage station
Fuselage Stations "FS" measure, in inches, the distance from an arbitrary point fore and aft on the aircraft. For simplicity, the zero point is usually located somewhere near the nose and is measured aft.
- Waterlines
Waterlines "WL" measure the vertical dimension. The reference point is usually near the ground and the positive direction is upward.
Conclusion
This wraps up chapter three! Now it is on to chapter 4 and the start of building actual airplane parts!